
Help Resources
Making things Sellable in XPOR
XPOR lets you make any kind of Object, the things you deal with, and then set whether they are to be handled as "Products". XPOR understands what "Products" are - they can be purchased through the e-commerce functions.
This Help Resource shows how to make any object type into a Product, so that you can sell them!
Table of Contents
- Overview of the Ecommerce Application
- Adding A Product
- Management Options
- Discounts
1. Overview of the Ecommerce Application
To open up the Ecommerce Application, first navigate to it in the Start XPOR menu in the backend. You will be met with this window:
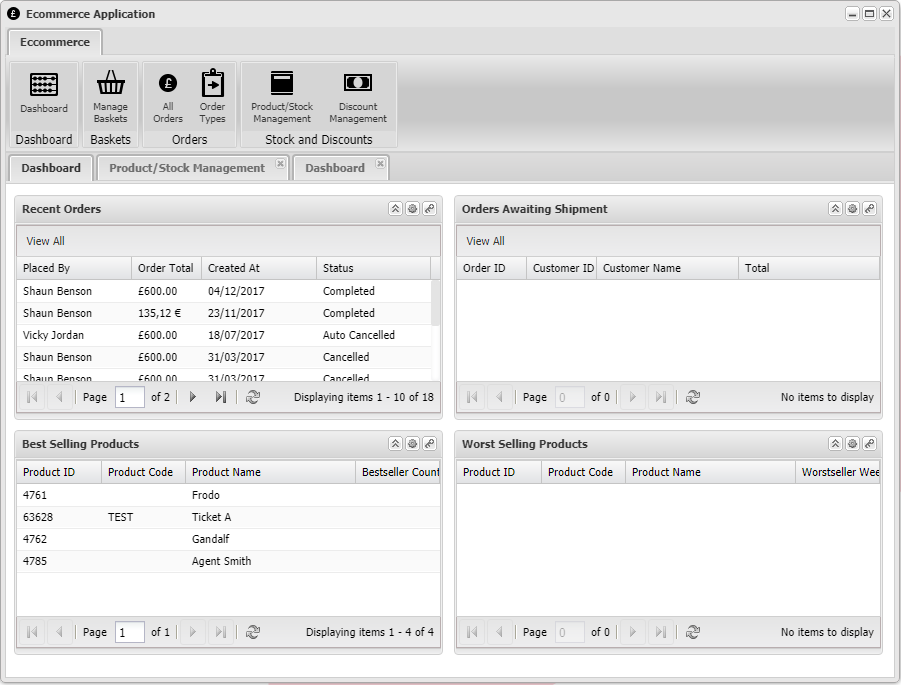
On a fresh install, these windows will be empty - in the above example some products are being sold through the application. The two new types of objects you will see here are Products and Orders.
- Products are individual objects. They are a special object type that allows them to be sold through this application. You can make a new product anywhere in your system and it will be automatically listed in the application. You can also set prices, stock counts and descriptions for each product, and then view how many products have been sold using the application window.
- Orders are what customers buy these products with. One order may contain many products. When an order is made by a customer, it is automatically listed in the application in two places - the Recent Orders window on the main dashboard, and the All Orders window from the top menu of the application.
As you will observe, the products and orders are all listed on your main dashboard. There are four windows which display useful information about the products.
- Recent Orders is a list of all orders, sorted by the most recent date that they were placed.
- Orders Awaiting Shipment is a list of orders, where the object is not marked as "Shipped". See the help resource on the Order object type for more information.
- Best Selling Products is a list of all products that have sold at least one item, sorted by highest amount sold.
- Worst Selling Products is a list of all products that have sold at least one item, sorted by lowest amount sold.
Adding a Product to the System
To add a new product, first choose a place in your system where you'd like to keep your products (they can be stored anywhere you like in your system, but it's always best to keep all products in the same place for ease of use) and then Add a new Product object.
Note that a Product object can only be created in either a Folder, a Product Category or an Order (for which they are automatically added when an order is made, so don't do this one on purpose!)
Once you have created your Product, use the Product object help resource to guide you through the information to add to your product so that you can begin selling it to customers.
Listing Products In Your System On Your Site
With your newly created Product objects, it's now time to list them out for sale. To do this you will want two things:
- A Product Listing atom, to show the customer a list of products, and
- A Basket atom, so the customer can place their order.
Each of these atoms have a Help Resource to guide you in setting up.
Management Options
Now that your products are listed and available to buy, you'll be going to your Ecommerce Application to observe the useful information coming in. From here you have a number of management options in addition to the previously outlined four display windows on your dashboard.
Navigating along the top menu will bring you through some more helpful options:
- Manage Baskets - this allows you to view a list of all pending baskets. When a logged in user adds a product to their basket, their basket will show up here. There are options on the side to either View Cart (double click for a list of all items in the cart) or Clear Cart (double click and confirm to remove all items from the cart). Note that these are not Objects,