Help Resources
Permissions Editor Interface
The Permissions Editor Interface is a grid used to manage the permissions on Objects and on Panels in Dashboards. The grid lists all of the objects that have permissions on the given Panel/Object and what types of permissions they have. However the Permissions Editor Interface is different for Objects and Dashboard Panels. Both of them can be used to add, change and remove permissions, however only the Permissions Editor Interface for Objects can be used to apply permissions recursively.
NOTE: This help resource only covers the Permissions Editor Interface and how to use it. For information about the different types of permissions and what they do, see additional help resource.
Adding Permissions
You can add two different types of entry to the Permission Editor Interface; individual objects and General Public permissions. When first added to the Permissions Editor Interface they will have no permissions set.
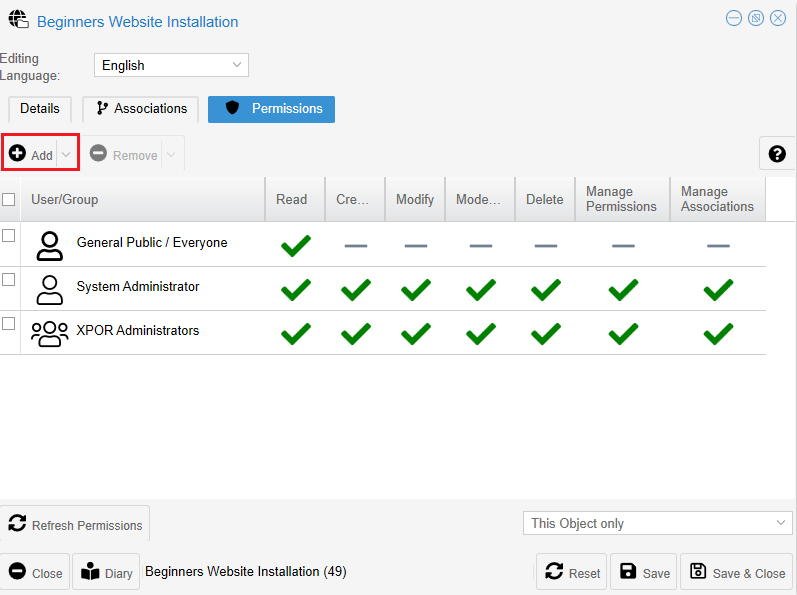
Adding Permissions for an Individual Object
1) Click the add button at the top left of the grid (highlighted in red in the image below).
2) Then, in the window that opens up, navigate to the object you want to add.
3) Single click the object to highlight it and then click the select button in the bottom right of the window.
Adding Permissions for the General Public
1) Click the arrow next to the add button at the top left of the grid (highlighted in red in the image below).
2) Then, in the dropdown menu that opens up, click General Public.
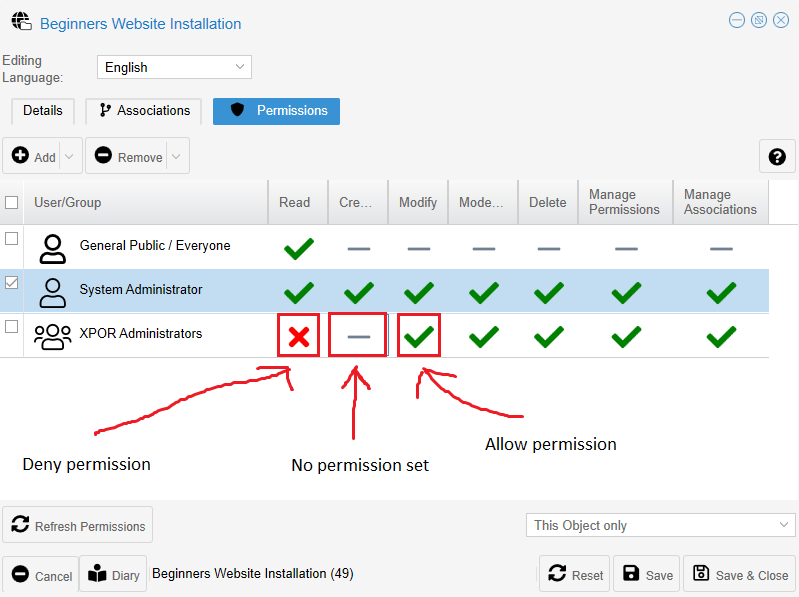
Changing Permissions
In the Permissions Editor Interface the different permission types are represented by different icons (see image below).
To change the permissions of an entry in the Permissions Editor Interface:
- Single click on the relevant column to change the entry to the next permission type.
- When changing an entry you may need to keep clicking to cycle through to the permission type you are after:
- No permission set changes to 'Allow Permission'
- 'Allow Permission' changes to 'Deny Permission'
- 'Deny Permission' changes back to no permission set
- Once you have changed an entry you must click the save button to save your changes.
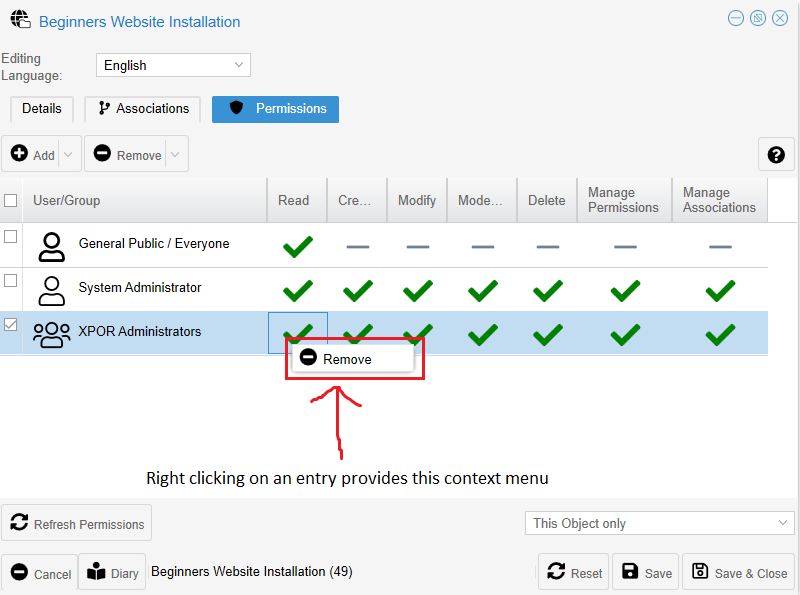
Removing Permissions
There are three ways of removing an entry from the Permissions Editor Interface:
1) Right click the entry you wish to remove and then click remove.
2) Use the check boxes on the left side of the rows to select multiple entries, then click the remove button at the top left of the grid to remove all of them.
3) Use the check boxes on the left side of the rows to select one or more entries, then click the arrow next to the remove button at the top left of the grid. Then, in the dropdown menu that opens up, click Remove Recursive. This will remove the entries you have selected from the Permissions Editor Interface for the object you are editing and all its children and their children and so on.
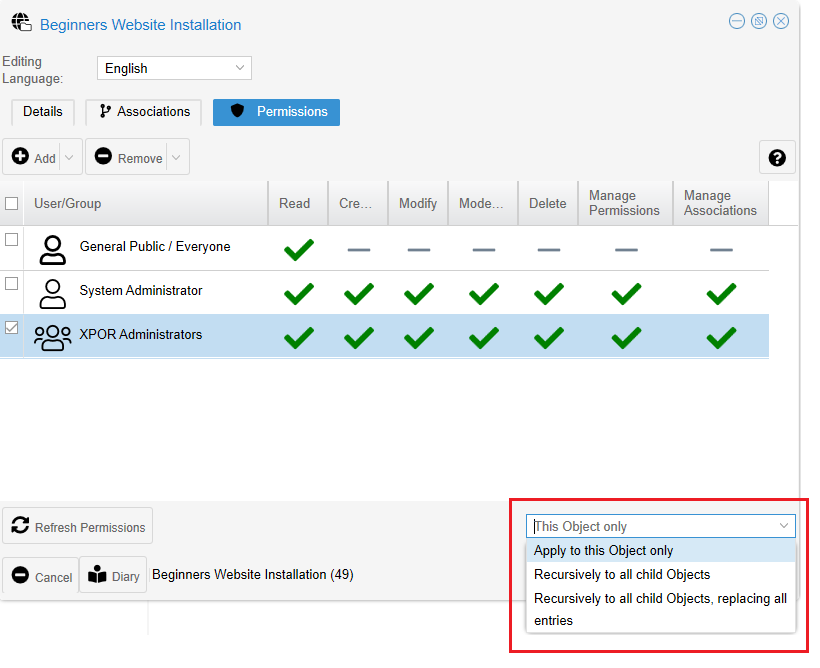
Recursively Applying Permissions
Recursively applying permissions effects all children of the object you are editing and all of their children and so on. To recursively apply permissions click the drop down in the bottom right of the Permissions Editor Interface. You will then be presented with three options:
1) 'Apply to this Object only' - the dropdown is set to this by default, this stops permissions being applied recursively.
2) 'Recursively to all child Objects' - if you set the dropdown to this, when you save the Object, its permissions will be recursively added to all child objects on top of any permissions they already had.
3) 'Recursively to all child Objects, replacing all entries' - if you set the dropdown to this, when you save the Object, it's permissions will be recursively added all child objects AND will also delete any other permissions they already had.