Help Resources
Top and Bottom Toolbars
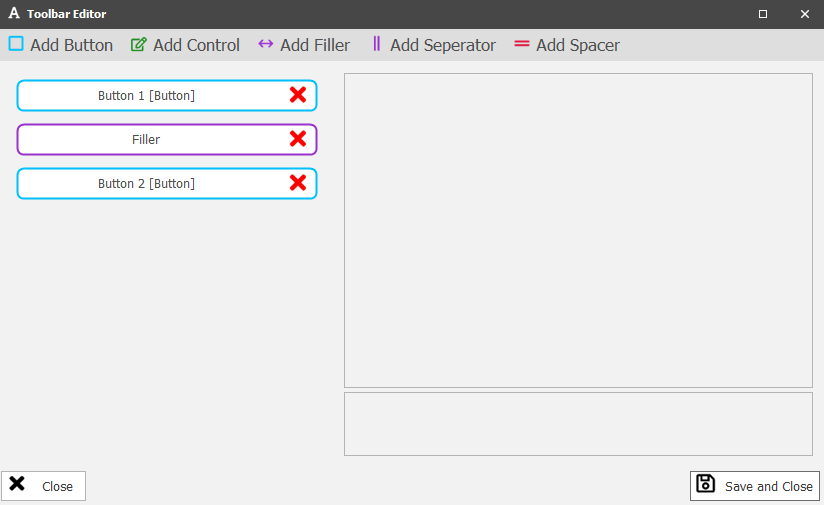
Toolbars can be added to Grids, Forms and Image Tabs. They are used to add "Buttons" and other controls to the top and bottom of these controls. To access the Toolbars press the 3 Dots next to the Field and a toolbar editor will popup.
How to use the Toolbar Editor

If the tool bar is empty it will appear as below. To add items either press the selected option in the button next to remove or use the drop down menu to select something else. It will then appear above where you can select and configure it in the right box. To remove items select the item you wish to remove and press the "Remove" button.

How To configure Buttons
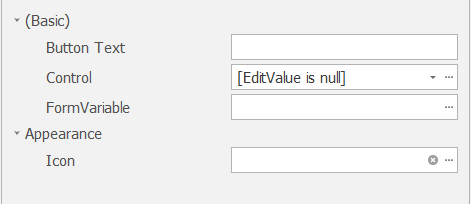
When setting up a button you have 3 fields to setup:
1) Action Click: Here is where you setup what happens when the button is clicked. To see more details about this please see the Action Designer Help Resource.
2) Icon: Here is where you setup the Icon that appears on the Button. To see more details about this please see the Icons Help Resource.
3) Text: The text in this field is the text that is on the button.
Separators
These are used to split up items on the toolbar using a thin verticle line. There is nothing that needs to be configured.
Fillers
Fillers are used to push everything past the filler to the right of the window. Filler is that yellow line below.

Spacers
Spacers add a Gap of a certain Pixel amount between the items either side of it. The only customization is the Width in pixels.
Controls
Controls are used in conjunction with a "Search Query" on the "Data Source" to search the listed objects. ONLY TO BE USED WITH A GRID!
If you want to filter a certain field you need to setup that field in the search query.
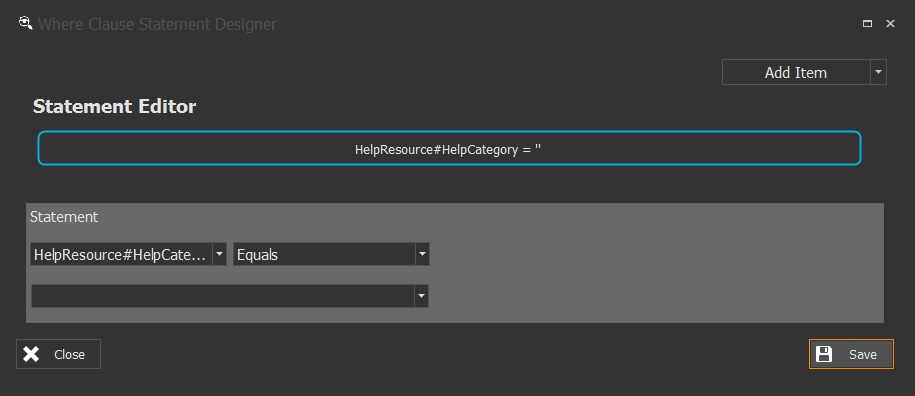
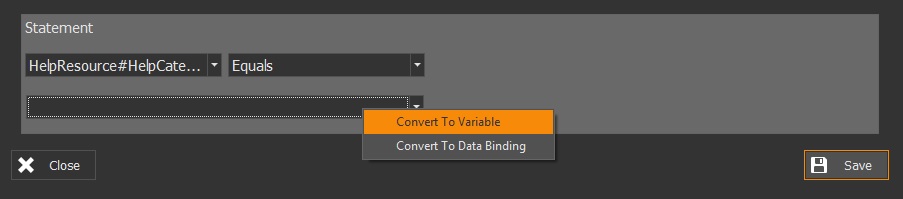
When the field and inequalities have been set its is time to make a new variable. First right click the empty field and select "Convert to Variable" then click the 3 dots to the right of that field and a variable editor will open.
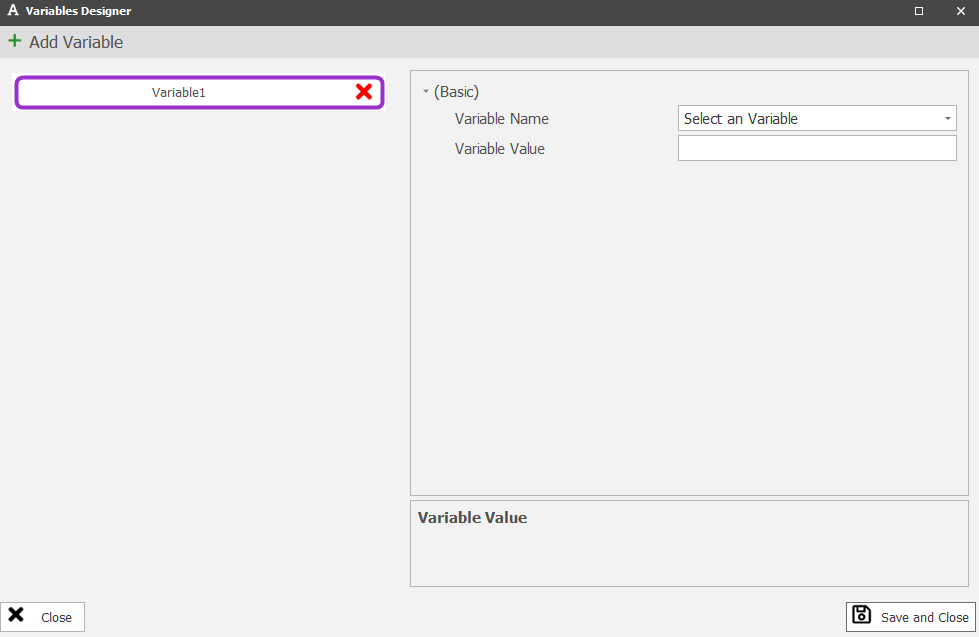
Next give your variable a name by typing into the first box, for my example I am using "Category". The Variable Type will be populated auomatically from the field selected. The default value can be left empty but if you require the grid to be pre-filtered you can configure that here. Press save and then save the data source.
Now you can add the control to the toolbar. In the dropdown for "ControlGuid" select the type of field needed then type the name of the FormVariable you just made.
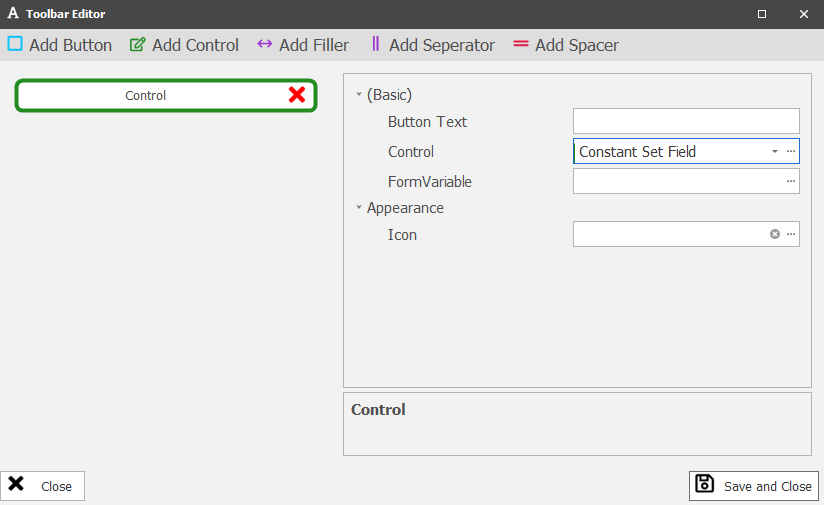
Next the "ControlGuid" needs to be configured, to do so click the 3 dots next to the "ControlGuid". All that needs to be setup here is the field label and field width. For Constant Sets the Dropdown Enum will also need to be configured.
Now you can Save all open windows and forms and check what is being displayed on the editor on the front end.