
In the Settings tab of your Email Campaign object you will find:
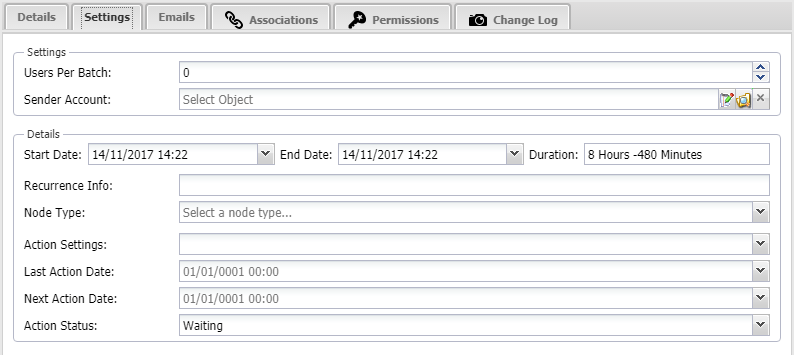
Users Per Batch
Users Per Batch is the number of users included in a "batch". A batch refers to a group of users in the Mailing List to which an e-mail is sent. Once an e-mail is sent to a given batch, the e-mail then goes on to the next batch of users. (For instance, if this field were set to 10, then the e-mail would be sent to 10 users at a time, then go to the next 10 users in the Mailing List.)
Sender Account
The Sender Account is a Contact object from which the e-mails will be sent. This can be any contact in your system that has an e-mail address entered in the contact's Primary E-mail Address field. It will send the e-mails from the address in that field - normally this is set to a contact with the appearance of your company's web service.
Mailing List
You'll have a mailing list of some sort - all these contacts will be on your Mailing List Object that you put in this field. The campaign will go down this list of contacts and add them to the first e-mail in the list, then move each contact down to the next e-mail once they have received it.
Send to Enabled Only
This checkbox sets the campaign manager to only send e-mails to accounts that are flagged with the "Enabled" status. The campaign will ignore contacts that have the Disabled status so they will not receive any e-mails.
Send as Dry Run
This checkbox does a dry run. A dry run is a test run that verifies the sending of e-mails, to check that the campaign will work with the current settings. This is useful for seeing if the current settings are desirable, allowing for the making of changes if not.
Start Date
The Start Date field indicates the date that the campaign begins. Upon this date, it sends out the first e-mail set up in the Email tab. It will then proceed through the e-mails as they are set up in the Email tab.
To configure the date in this field, drop the menu down by clicking on the arrow to the right of the field. You'll be met with the date time configuration settings:

To the left is a calendar navigation menu; the two arrows in the top corners select a month, the drop down menu in the top centre allows you to select a year, and the bottom grid allows you to select the day. Once you have your date, the two sliders on the right pane allow you to select the time on that day. It is a 24 hour clock so bear this in mind when selecting the time.
Recurrence Info
The Recurrence Info field is where the specifics of the e-mail sending are described. These are the intervals to send batches of e-mails and send new e-mails. You also won't need to worry about accidentally sending loads of e-mails in one go, or precariously managing and timing when to send new e-mails; these settings do it for you.
Last Action Date
This date box is an automatically recorded time that lets you know when the last e-mail was sent. It is useful for checking that the settings are working as you intend them to, while also being a reference point for when you would like the next action (a new batch, or a new e-mail) to be carried out.
Next Action Date
This date box is also automatically recorded and lets you know when the next action is due to happen. This date is decided by the current settings that are in place, providing a useful reference as to whether the current settings are correct, or require modification.
Action Status
This refers to the current stage of the Campaign. There are three options:
- Waiting - the campaign has not started yet (the Start Date, or the first batch of e-mails, is set in the future)
- Started - the campaign is in the process of sending e-mails.
- Failed - the campaign encountered an issue with the settings provided to it. This can normally be checked by looking at the Emails tab and seeing which e-mail it was on when the campaign stopped working.
Adding an e-mail batch to the campaign is very simple. In the Email tab at the top, there is the option to create a new e-mail batch. This takes the content of an Email object and designates it so that it is sent out to batches of users, and you can configure the timing settings at which it does this sending.
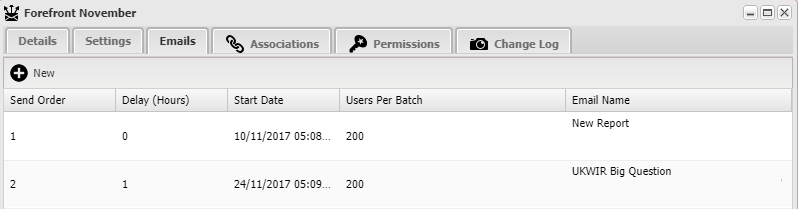
In the above image are some examples of e-mails that are already in the system. Note that these are not e-mail objects, but instead a slightly different object called XPOR Campaign Email objects. These are just like normal e-mail objects but give you some extra options. These options allow you to adjust settings such as the amount of users in a batch to send to at once, and the delay in hours before moving onto the next batch of users - all things that will work with your new campaign.
Let's add a new e-mail to this list first, to understand how it all works. Click the "+New" button at the top left to be taken to this page:
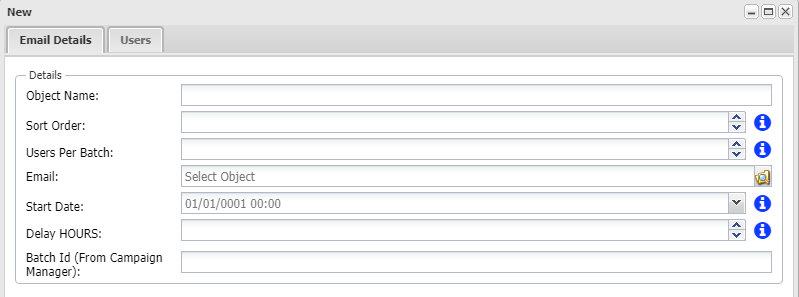
This has opened up a new, blank campaign e-mail that we can add the details to.
Object Name
A field to provide the name of the e-mail. This can be whatever you like (it does not have to be the name of the e-mail object itself, you can give it a new campaign e-mail name if you so desired).
Sort Order
The number in this field will decide the order that the e-mail is sent in, starting at 1 and then proceeding upwards. The first e-mail you would want to send out would have a 1, and then subsequent e-mails would have 2, 3, 4 etc in this field.
Users Per Batch
The number in this field decides how many users in the mailing list that the e-mail is sent to at once. This can be different for every e-mail depending on the type of marketing campaign you wish to run. User batches also allow you to check that everything is okay between batches.
This is the actual e-mail object. You can choose an e-mail that you've set up earlier, or you can make a new one. The contents and settings of this e-mail object will be the e-mail that is sent out on this batch - such as the actual contents of the e-mail, the e-mail template and the subject line.
Start Date
This is the date that the batch begins sending out users. It will start with the amount of users you've specified in the Users Per Batch field (so if it were set to 100 users, then the Start Date would send out e-mails to this batch on this date, before sending the next batch).
Delay Hours
This is the amount of time, in hours, between batches. It allows you to specify the interval at which batches are sent.
Batch Id
This field automatically fills in when the e-mail begins sending out - because once the process begins, the e-mail becomes visible in your Email Campaign Manager from the Start XPOR menu under either the Send Queue or Sent Emails pane. This is useful when you would like to find a specific batch while the campaign is active.
Once you've finished filling in the fields with your desired settings, click Save to be returned to the Email batch list:
You will see that your newly created e-mail has been added to the list, and any others that you create will be kept on this same list, so that you can see all e-mails that you're managing at once.
We can see here that the send order value decides the order of e-mail sending. You will want to make sure that the time you have chosen for the start date works with the selected order, as the send order takes priority. For instance, if one e-mail had the send order value 1, but had a start date after another e-mail with the send order value 2, the send order 1 e-mail would still be sent first, despite it having a later start date. The second e-mail would then begin sending after the first one has finished.
In the Associations tab it is possible to see more about how the campaign manager is set up.
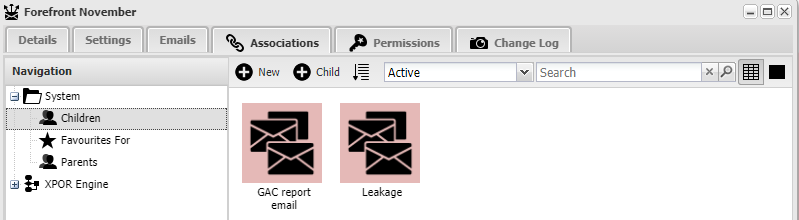
Under Children we can see the contents of our list of Email batches from earlier - they are associated to your Campaign object as children. By going to the Navigation pane on the left and opening up XPOR Engine (double click) we can see the other associations that have been set up.
The drop down of XPOR Engine reveals three new associations: Automation Schemas, Marketing Campaign Mailing List and Marketing Email Account. The last two are the ones that are used by the Campaign object.
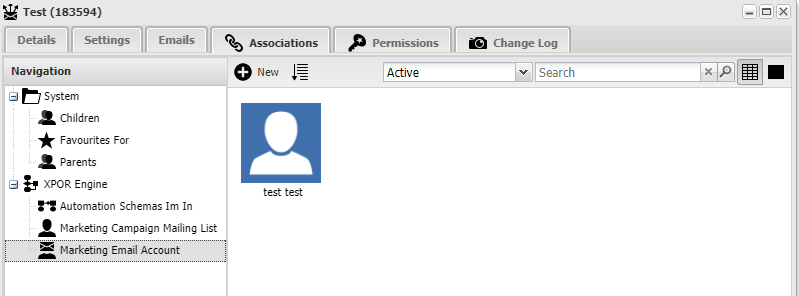
Under Marketing Email Account, we will see the Contact object that was added in the Settings tab under "Sender Account". Sometimes you will want to access the contact object itself to modify some of its details - by clicking on the association, you have a quick means of doing so.
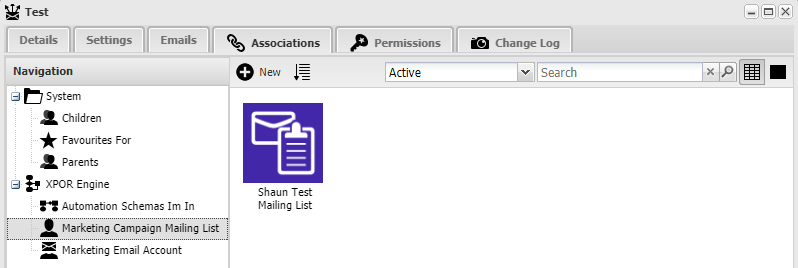
Similarly, under Marketing Campaign Mailing List will be the Mailing List object that was added in the Settings tab. To quickly access the Mailing List and make changes, either to its settings or to the contacts within, you can use this association type.