XPOR Visions enables you to build the structure of your system, whilst sketching it out as you go. This visual method of building your system architecture means you no longer need to produce significant volumes of documnenation, either for development or archive purposes. The XPOR Vision shows you exactly how you built your system model and enables speedy overviewing of how things work.
What is a Vision?
In XPOR, all of the different Object Types are connected, through "Associations". So, if you were to look at a brand new installation of XPOR, you would see all of the "core" object types connected to each other, something like;
... which is far too complicated to be any use as a design document! In fact this just gets more complicated as you add in your own custom Object Types.
Visions are therefore firstly intended to provide you with the ability to select object types from XPOR that you are interested in. Add them to a blank Vision and see how they are connected (if at all). We consider them as a type of "snapshot" onto the overall system that has been built with XPOR.
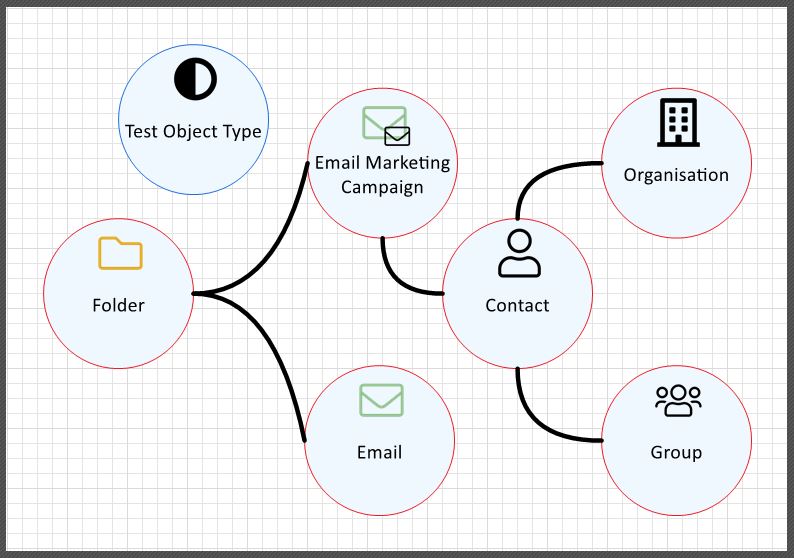
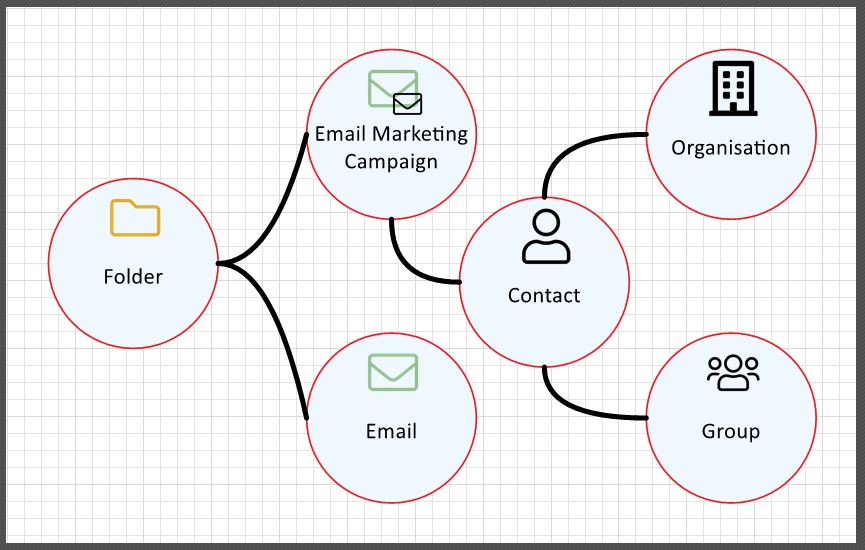
For example, the Vision shown below is simply a collection of Core Object Types concerning email. They are also seen on the entire system Vision (shown above), where they are too small to see in adequate detail. Hence we can make a Vision simply for the object types we choose;
XPOR Visions also enables you to BUILD a system using this method.
You can use the Vision functions either in the top Toolbar, the right click Context Menu and the RH column that opens in response to the Context menu.
Creating a New Vision
We display the Default Vision on your System Modeller Start Page. To create a NEW Vision click "Add Vision";
Give your Vision a Name, Description and Category and then open the Vision Diagram Tab;
On this blank Vision you will see the list of available Object Types on the Right Hand Side of the pane, which are ordered by their categories. Click on a category title to open the Object Types stored under that Category. Alternatively uses the Search box to find an Object Type you want to add to the Vision.
Clcik the Sleecetd Object Type (we chose "Email" in this example) and confirm you want to Add to Vision. This will palce the first Object type on your Vision. It looks a little odd on its' own;
Add all of the Object Types you want to display on the Vision and arange them as you feel fit and click Save.
Visions will also organise your layout automatically in predefined layouts;
Set Default System Vision
You can set this New Vision to be the Vision that is displayed on the Start Page by clicking the Set Default System Vision button on the Top Toolbar.
Creating a brand New Object Type
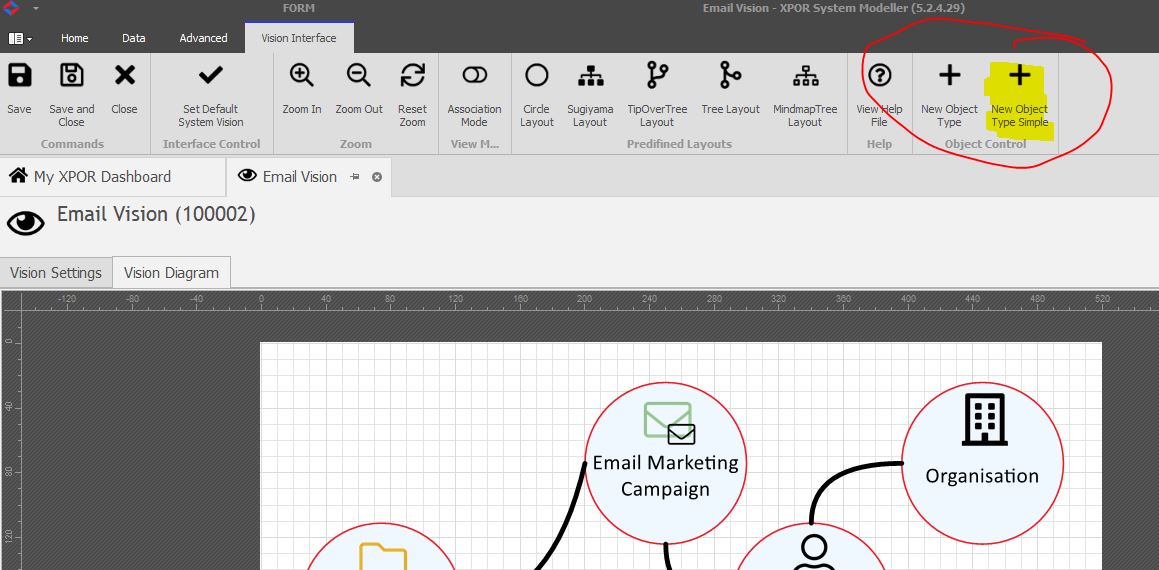
It is possible to create your entire system architecture, using Visions. So far we have added Core object types to the Vision. But, on the Top Toolbar, you can also add a New Object Type. In fact we provide TWO methods of adding New Object Types - a method of jumping to the standard Object Editor and a "Simple" method, intended primarily for use with Visions. Whilst the standard Object Type creation method is explained under its' own Help Resource. This Help Resource concentrates on the Vision /Simple method;
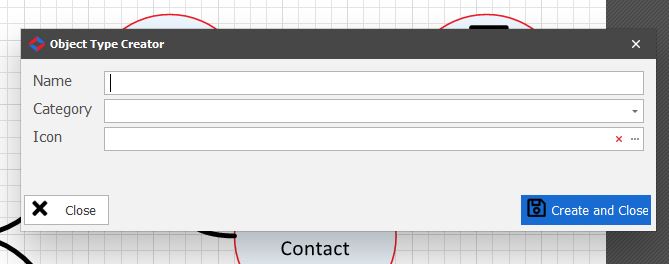
Clicking the "+ New Object Type Simple" opens a form to give the new Object Type a Name, an IconDescription and Category;
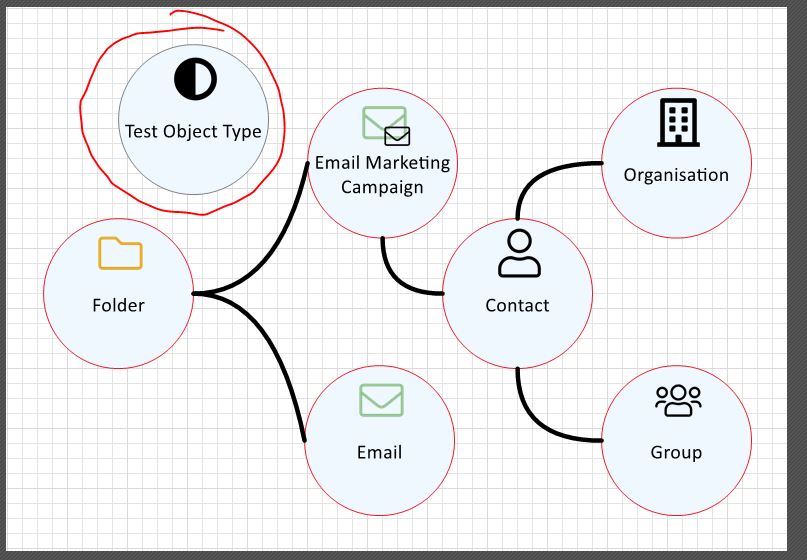
Completing this form will create the Object Type and place it on the Vision - outlined in Grey;
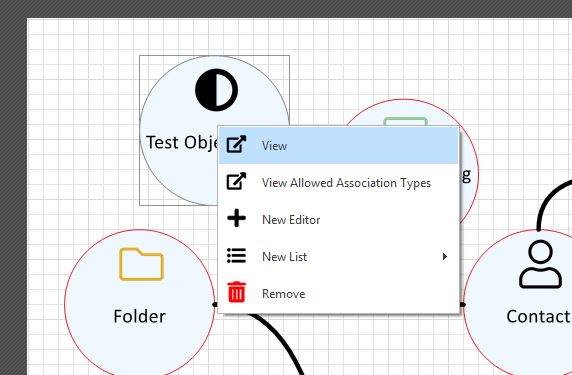
In order to edit this new Object Type and ad in the required Propoerties, right click it on the Vision sketch and selct View on the pop-oput Context Menu;
This will show the general details of your new Object Type in the RH column. Click the Edit Object Type button to open the standard Object Type editor form - and follow the instructions for crteateing new objectr types the "standard" way.
When you Build the new object type (from the Top Toolbar menu on the Object Type editor form) and retrun to the Vision, you will see that the Objewct Type is now bordered in BLUE;
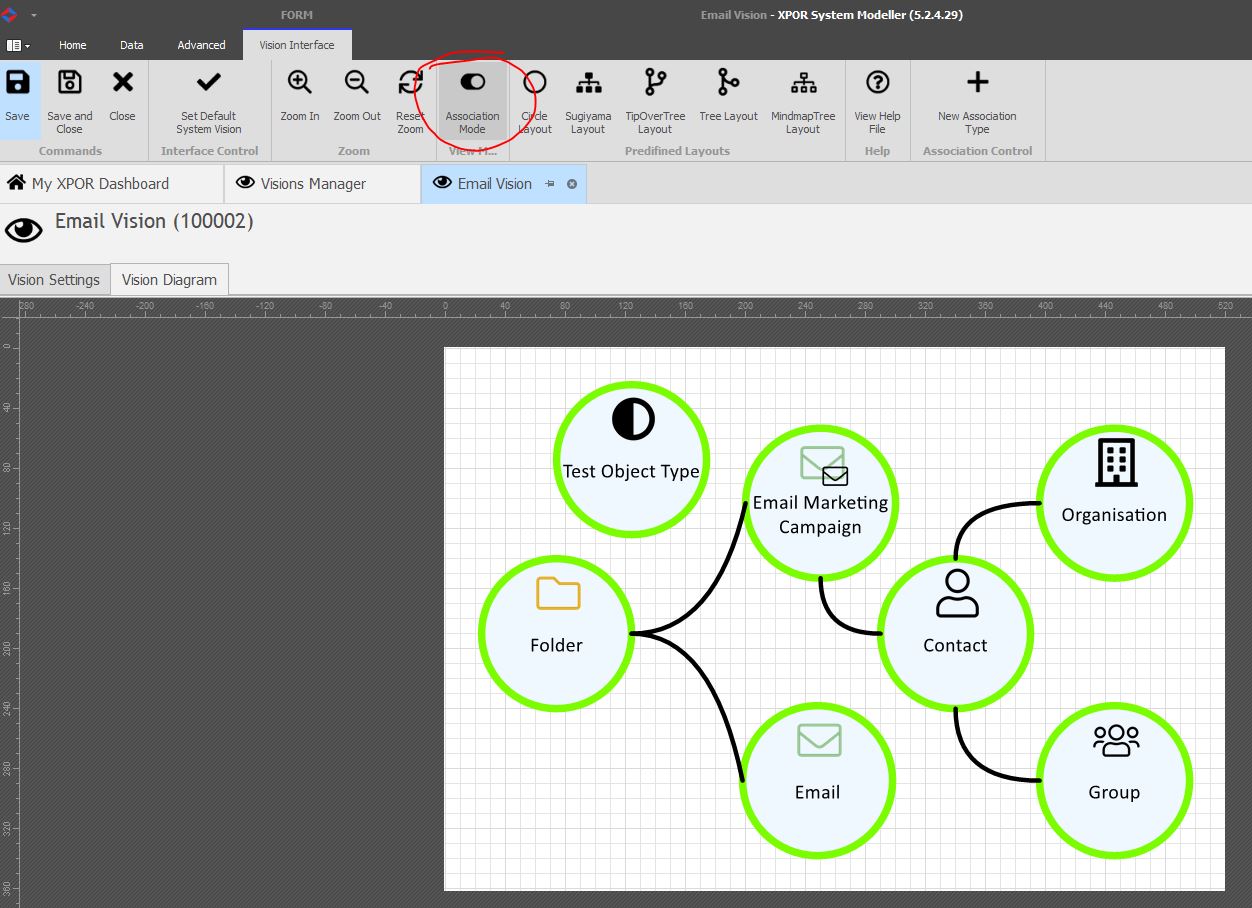
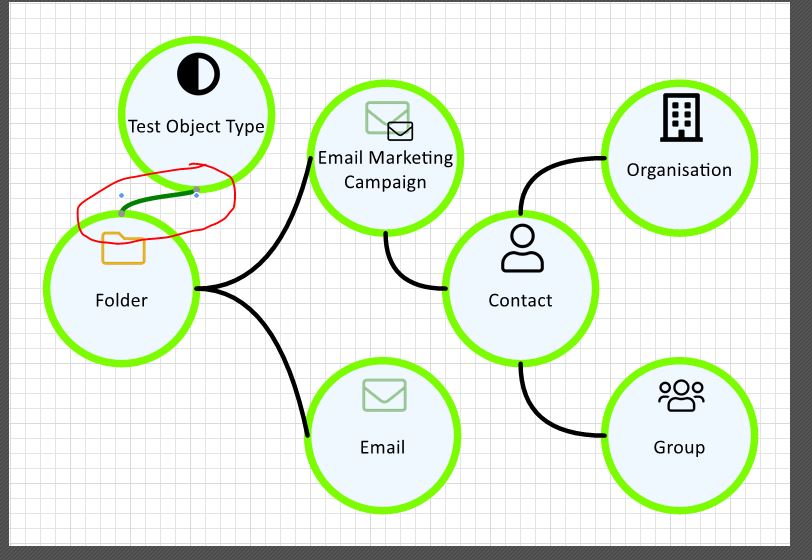
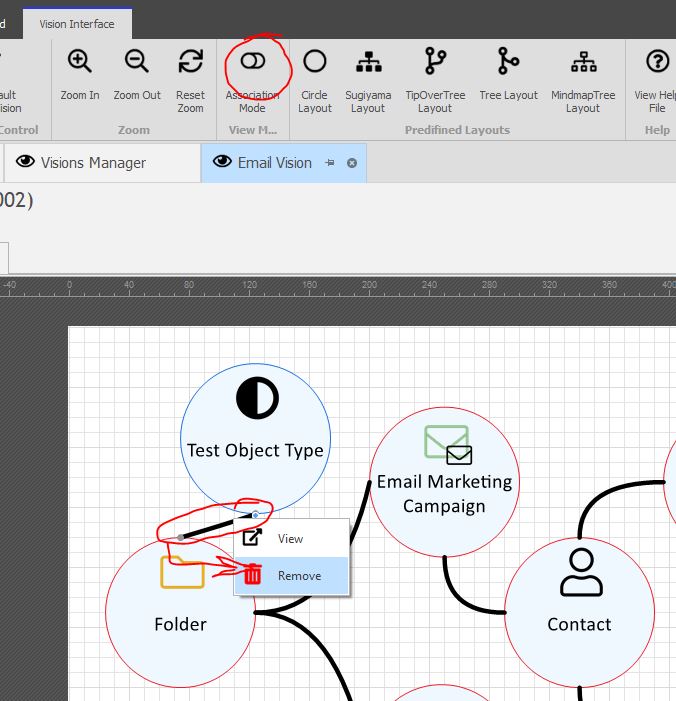
You can now "Associate" the new object type to other Object types in your Vision. To do this change the Vision Mode, using the Association mode button in the Top Toolbar;
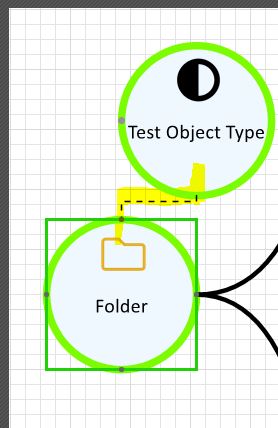
In this Mode you can connect your various Object Types, either by "standard" Association types or by your own custom Association Types. Click and drag from Obect type you want to connect from (the Parent for example) to the other Object Type (for Child for example), and let go;
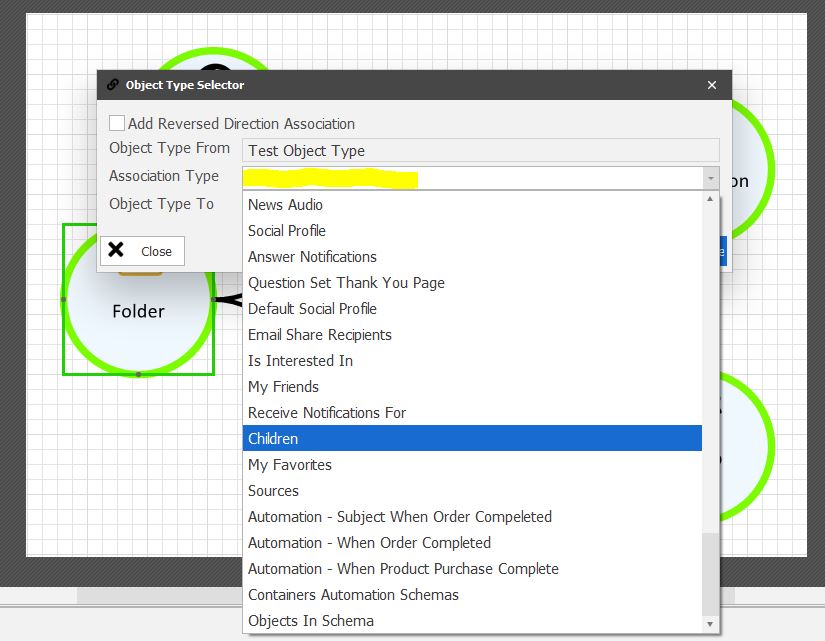
This will open a form for you to select the Association type you wish to use for this Association - the Object Type Freom and the Object Type To will be populated intg he order yoiu dragged / connected above. Click the Association Type drop down to diaplsy and connect the required Association Type - in this example we are going to make the Association "Test Object Type" has "Children" of object type "Folder";
Create the Create and Close button, to be returned to the Vision, with the Association added between the selected Object Types.
If you are not happy with the Association you have just made, retrun the Vision Mode to standard Mode, right click the Association Line and select "Remove";


