Creating a New Website
You can create as many websites in your XPOR as you want(!). When you purchased your XPOR licence you will have been provided with a web address to access your XPOR installation, together with a Starter website Installation Folder, Starter Templates, a couple of web pages and all the necessary components to experiment with content editing, in both the Front and Back end of XPOR. We will also have provided you with a temporary web address to access the website.
The following overview explains how to create a completely new website, from scratch - the site where you probably want your users to access our new web service. So, if you don't already have one, purchase your web address (domain). They're not expensive and allow you to configure other services, like email and FTP.
"Point" your new domain to the server IP that will be hosting your new website, e.g. 195.171.25.77. If you are using our hosting services, we will tell you what this IP address is. You may need to check with the company from whom you purchased the domain how you achieve this.
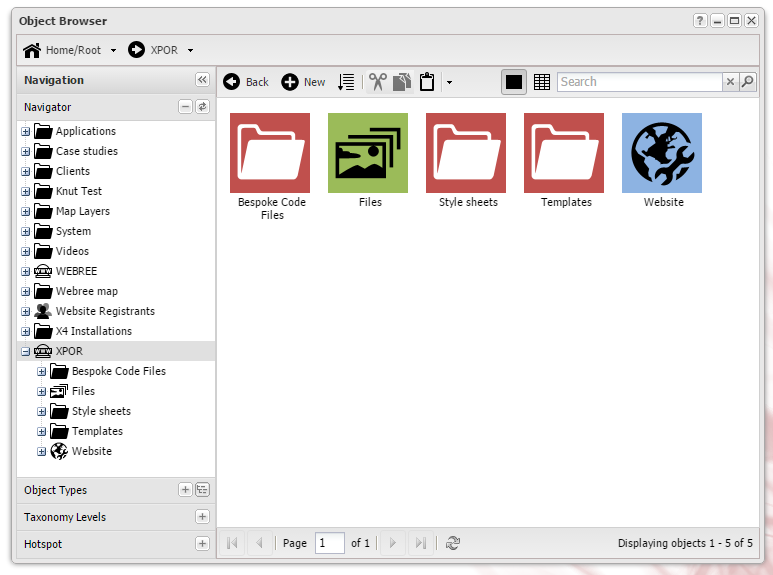
Then, visit the web address you have been given with your licence, and log in with the Account details we have also provided. Use the XPOR start button to open the Object Browser and browse to where you want to store your new website;
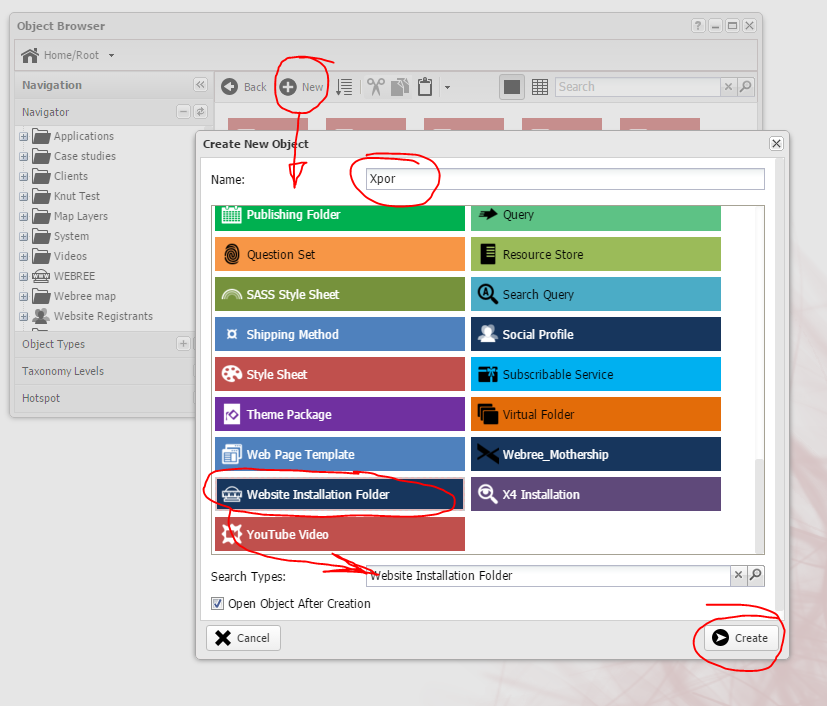
Click the +New button, select the “Website Installation Folder” object type and give your new object a name – in this case we are calling it XPOR;
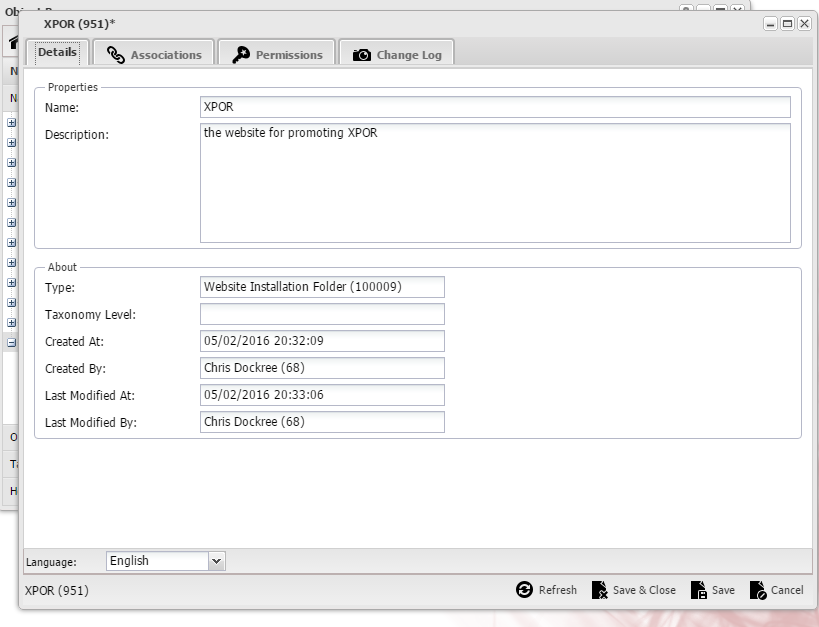
… click the Create button and open the new Website Installation Folder object for editing. Here we have started that process by calling the folder "XPOR" and giving it a Description;
The Website Installation Folder object is a simple thing, so not much to set on it. Its purpose is to hold all of the files, templates and websites that you may subsequently want to build / use.
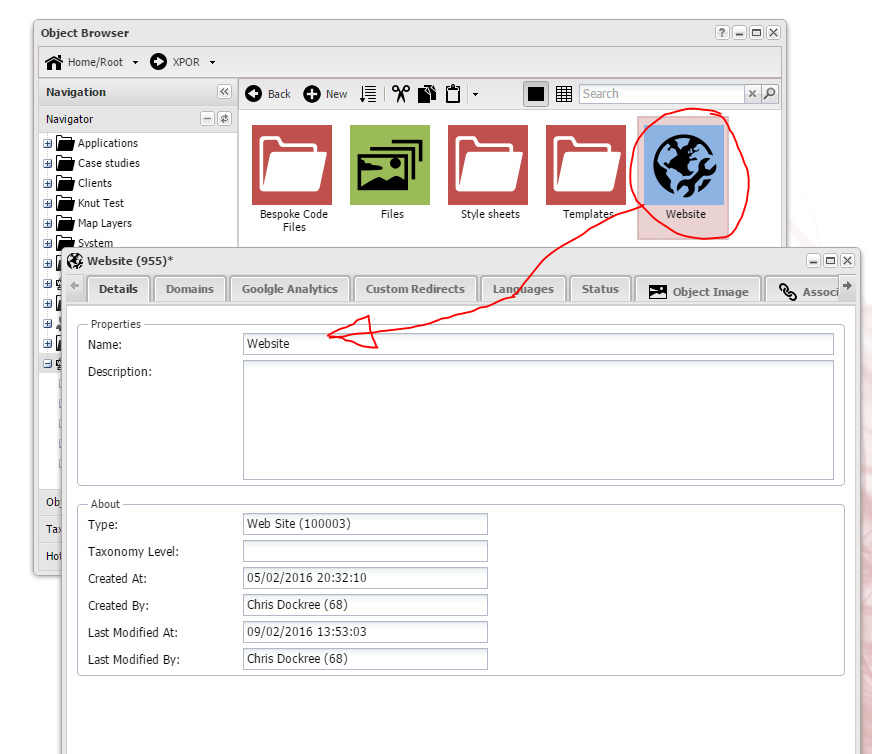
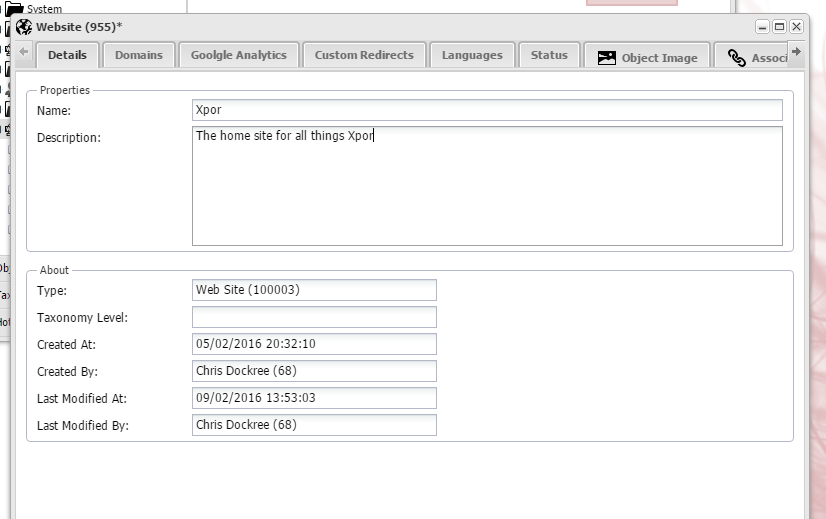
In this case we are going to add / build a new website called XPOR, so we will edit the website object name. Note, the website folders name is not used anywhere - it is simply the name of this object. When you have several websites running on your XPOR you'll understand why you need them to be named;
As you can see from the Tabs, there are a number of things that can be configured on websites, which are covered in a separate Help Resource focussed on the Website Object. But to see this Help Resource through, we will look at the Domains Tab, to set a Domain on the website such that it can be accessed via a browser.
Domains
Domains are the website address, such as xpor.com. You will have previously bought and “pointed” your domain to the host XPOR server. The pointing is achieved by creating an "A" record on the domain, for example we have purchased XPOR.COM and created an A record for WWW.XPOR.COM pointed 195.171.25.77. This is the IP address of the server that is hosting the example XPOR installation. You will be provided with the IP address of your host server when you purchase your XPOR licence.
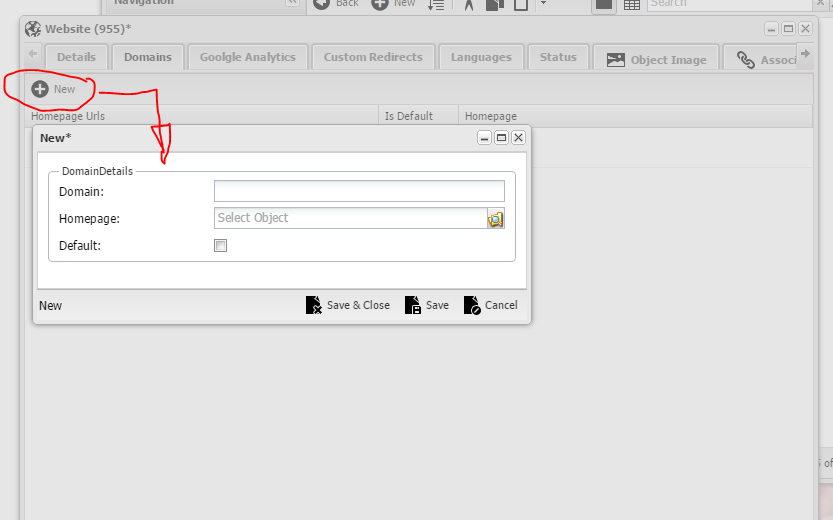
So we are now going to add this address (URL) to the new XPOR website;
Once this is set we will be able to access the website ... though we don't yet have a web page to get to. So let’s create a new web page.
Web Pages
Of course a website is nothing without web pages. XPOR web pages deliver all of the function, whether that is simple content, bespoke forms, complete Blog services, Social integration ... etc. with no restrictions on how many pages you can add. And they are very easy to add and Manage. For those people who want more sophisticated control, the web page management system also has Version and Moderation control (separate Help Resource).
Web pages are gateways to your data and function, so you are also provided with an access control service - integrated account and permissions management (separate Help Resource).
Web pages are built from TEMPLATES, which are created in your Object Modeller. (We provide two basic templates with your installation and a separate Help Resource to explain their creation and management). Templates form the physical skeleton for the web page PLUS they can carry default functions, such as an “HTML editor”, a “Form Manager”, ”Blog”, "Social Sharing" etc. – we call these "ATOM TYPES". (each Atom Type is covered by its' own Help resource).
Templates also carry the "Style Sheet Themes" that set basic colours, font, positioning, movement etc. on pages. Themes are also provided with a separate Help Resource.
You can make as many pages as you want from a single template. XPOR has a clever built-in function that allows you to create a web page from a selected Template BUT then override the default settings provided by the template, to customise the function on the new web page. So you don't necessarily need a LOT of templates. Most sites only need a couple of templates, because of this feature.
The key point, however, is that you NEED a Template before you can make a Web Page.
Web Page Templates
There are two steps to creating a new Web Page Template. Firstly you create a new Web Page template object in your XPOR admin Templates Folder. You can use Add New or Copy / Paste an existing Template into the Folder. Then you use XPOR Object Modeller to further configure the Template. This strictly controls who can do what to this core feature of your website.
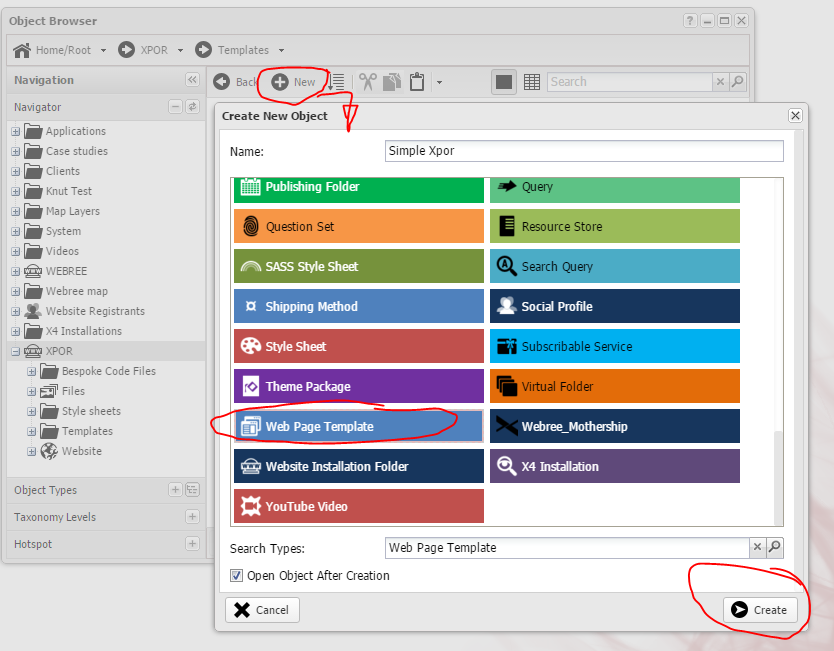
To make a blank template, navigate to where you want to store the Template (Note that we provide you with a simple folder to store these in, if you wish to use it (which we will do here).
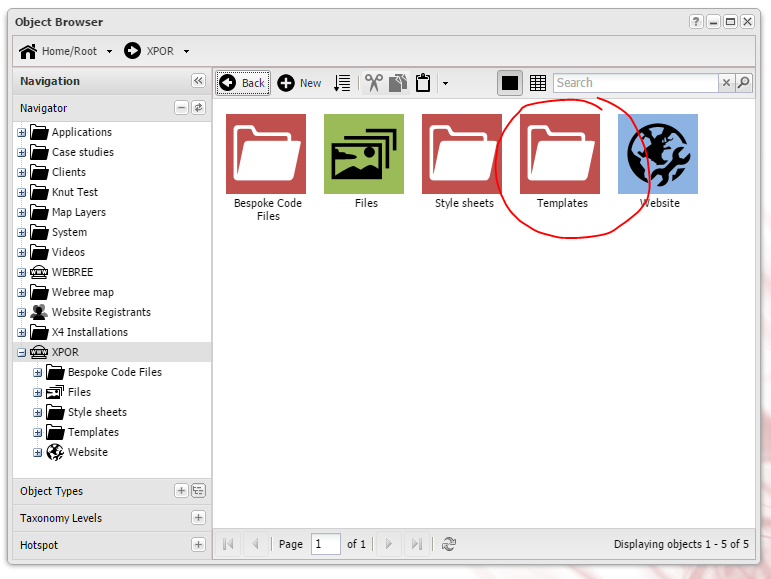
Click the +New button and select “Web Page Template” object and then the Create button.
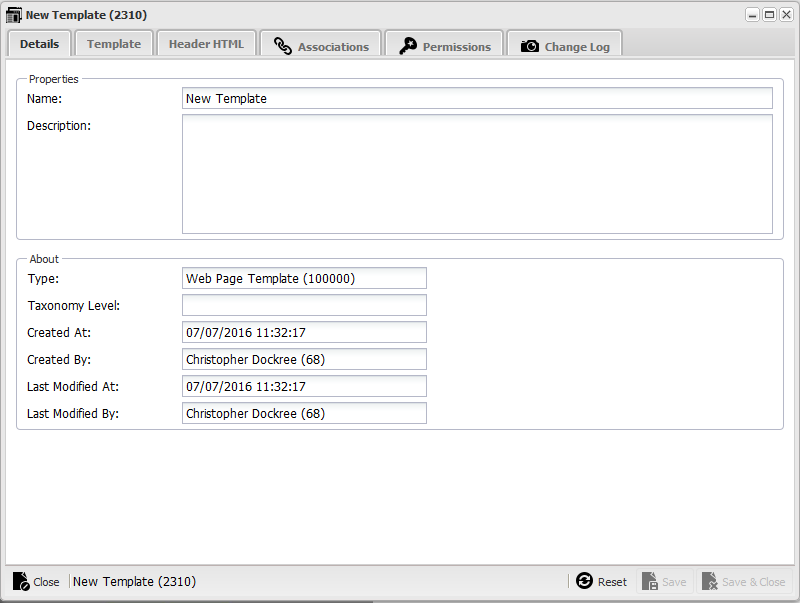
You will now have a new Template object displayed in your template Folder, which will look something like;
This template will also be available in XPOR Object Modeller, where you can completely build / configure it.
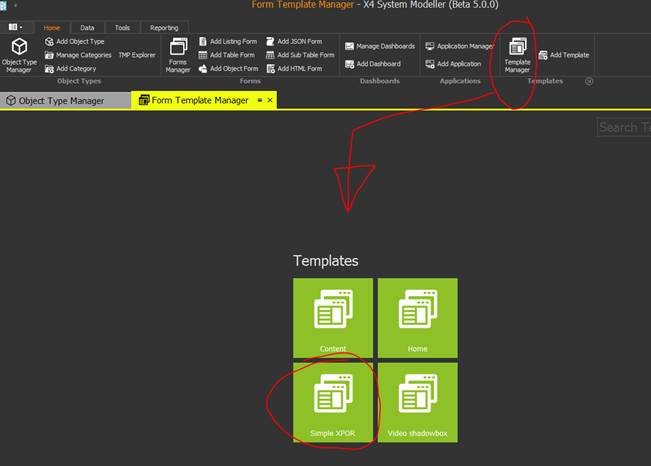
Fire up XPOR Object Modeller, connect to your website and click the Template Manager button;
You will see your new template listed (ignore the other three templates , which are used elsewhere). Click it to open the template to edit it;
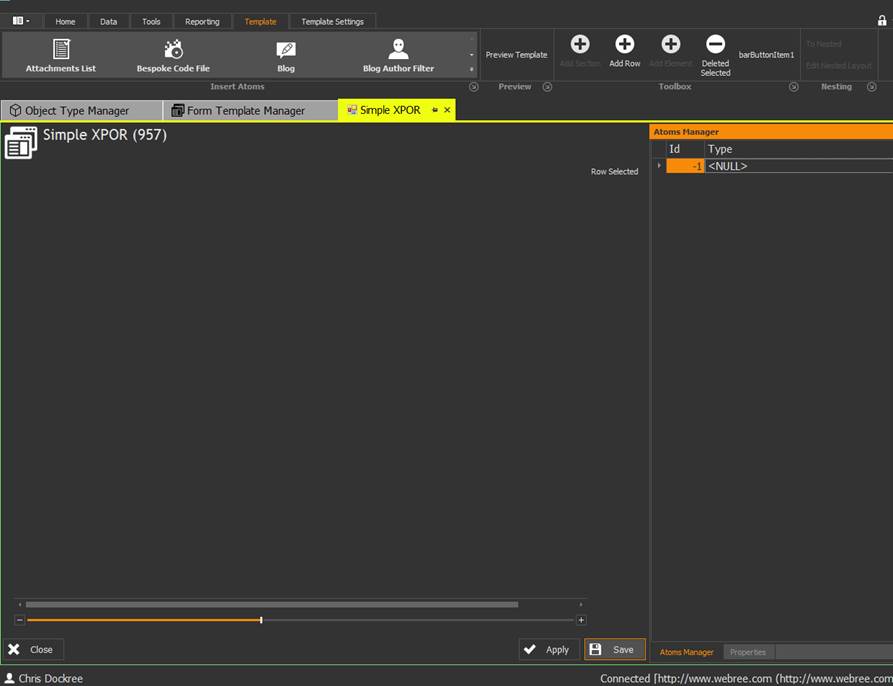
… it’s blank to start with! Templates consist of “Sections”, “Rows” and “Elements”.
Section
Rows
Elements

The Sections and Rows let you build the Framework for your page, setting where things appear and how they responsively react to being viewed in smaller / larger format viewers, such as phones and tablets.
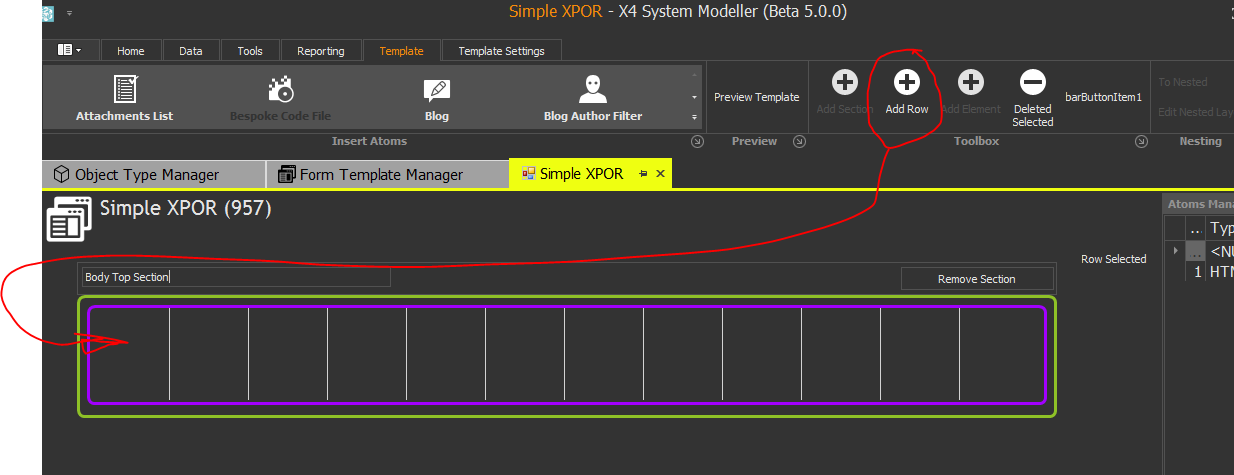
So the first thing we do is add a Section to the template. Give it a name – e.g. “Body Top Section”.
Now we can add a Row in. Click the Section and click Add Row;
This adds a Row to your template – with 12 “responsive” columns.
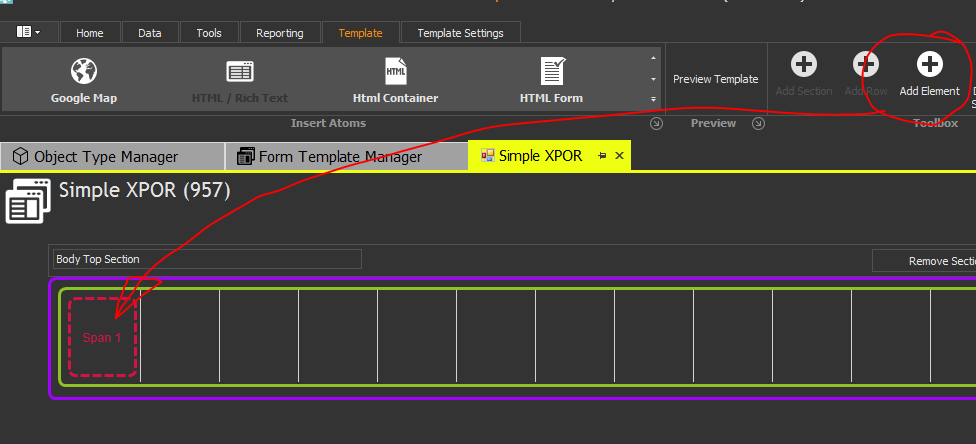
Now we can put an “Element” into one of the Cells and configure it with an “Atom”. For this example we will put an “HTML / Rich Text” Atom into the first Element. Click on the cell and click “Add Element”.
Now you can add an “Atom Type” from the “Insert Atoms” menu, to this Element;
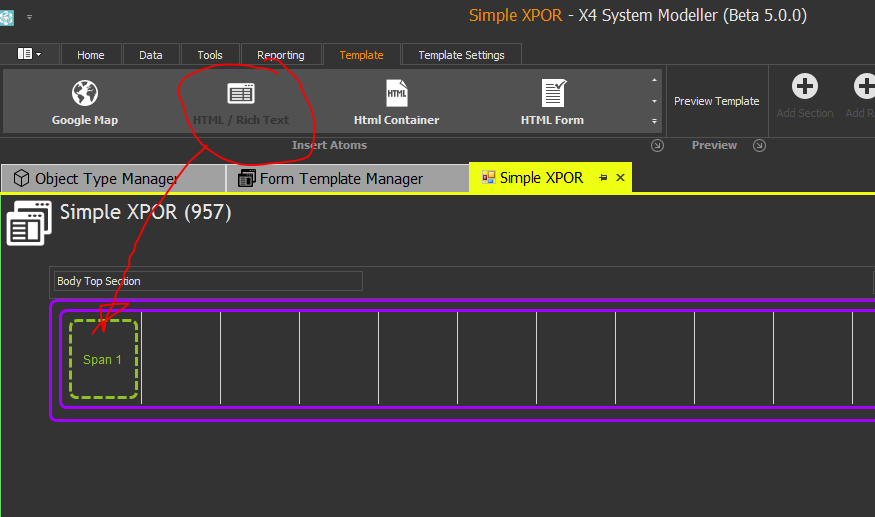
So you have now made a very simple template. Save / Close it and re-open it, to look at the properties of each part, in the Properties column on the Right hand side. Full details of how Template Designer is used are provided in a separate Help Resource. But now we have our very simple basic Web Page Template created we can move to the next stage to set it up for creating a web page.
Adding a Web Page
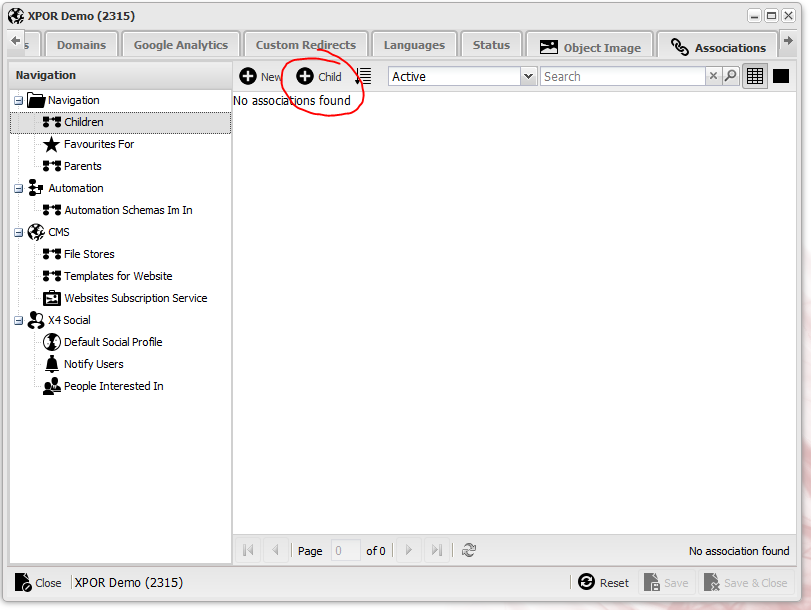
Now you have your website created, we can add a web page to it. Web Pages can be created as "children" of Websites, Website Folders, other Web Pages and a few other objects. So we can start building our new website by adding a page as a Child of our Website.
Log into the back end of your XPOR website - using the access details provided with your licence. Browse to your new website "Globe" and add a new "Child"
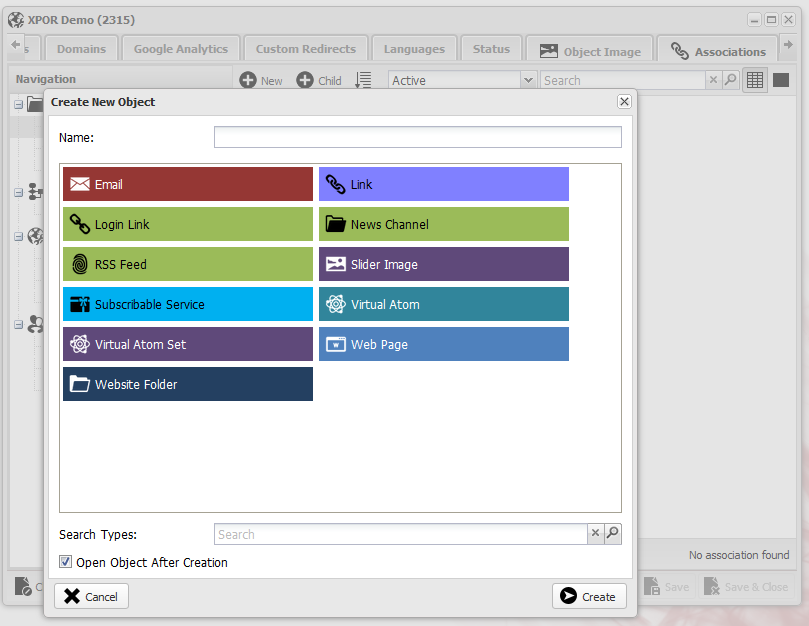
This will list out the objects that can be added as children, from which you can select to create a new Web Page;
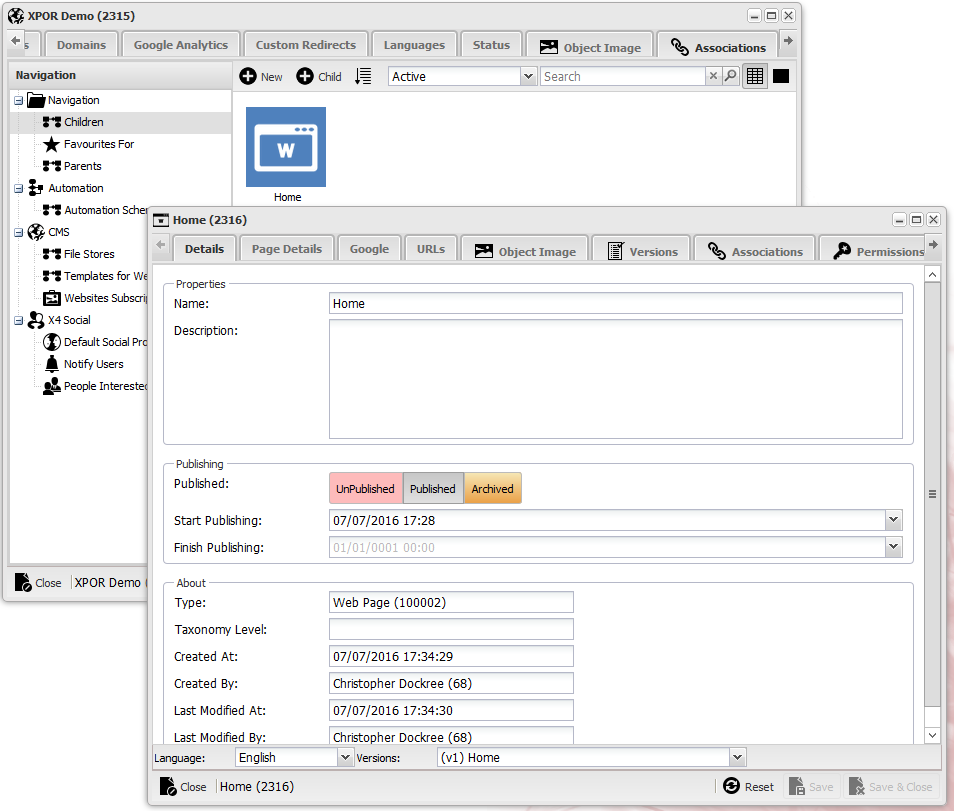
Give your new web page a name. In our example we are creating the HOME page - so we have called it "Home" - fine for our Demo BUT not good practice in general. The Page Name is important to search engines as they use this to categorise the page. So better to call the Home Page "A phrase that you want Search Engines to put to the top of rankings".
The web page has a series of tabs, to provide a lot of control as to how the web page is set up / works. These are all explained in a separate Help Resource. However we will concentrate on a couple of the tabs to complete our first web page.
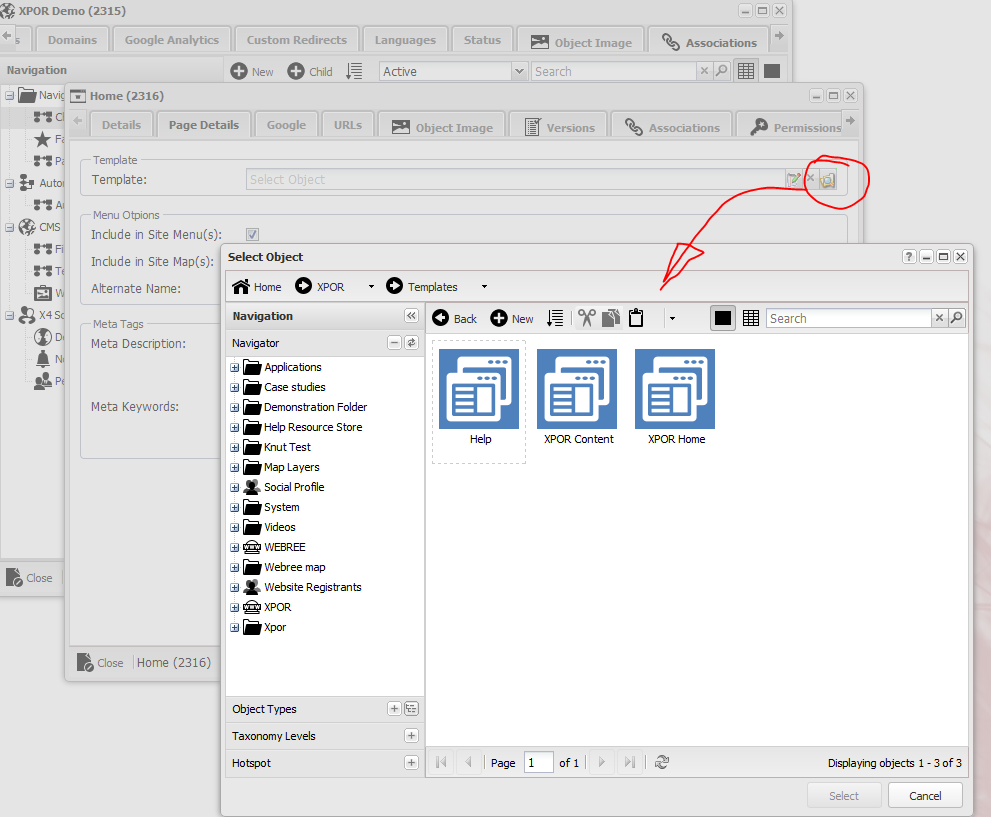
The web page needs to have a Template, to take the default features and layout to generate the page. Click on the Page Details Tab and the select icon for "Template";
Browse to find your folder containing your new Template (as made above) and select it. Now save the Page. This will close the web page object editor and return you to the list of children of the website.
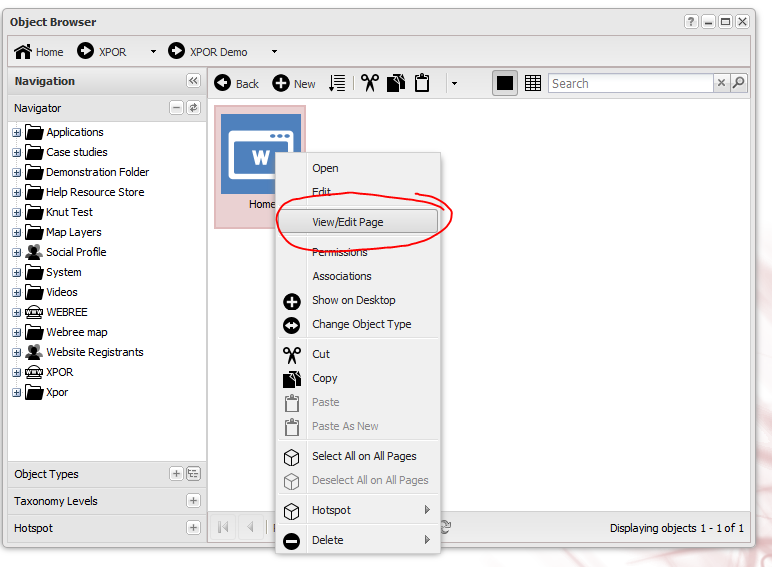
The web page is now made. You can access it on the front of the website by opening a browser and typing in the address http://www.mydomain/"page name". A quicker way of accessing the page is to right click the new web page icon and "View / Edit Page". This will open the page in a new browser tab, where you can edit it as required. (see separate Help Resource for editing web pages).
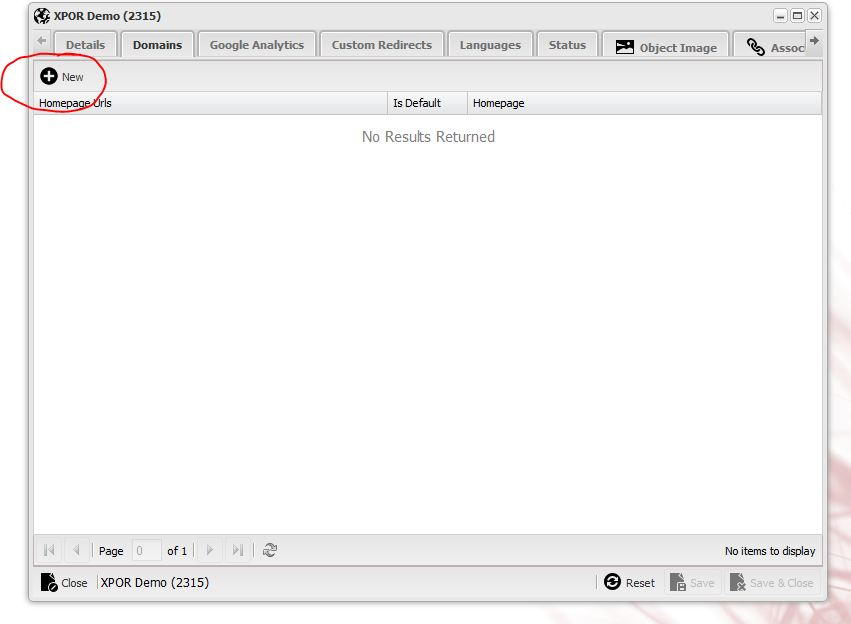
Ideally, given this is the Home Page of your website, you will simply enter the domain name in your browser and the web page will open. This is configured on the Website object itself. Browse to the Website object and Edit it. The Website object has a tab "Domains". This tab presents a list of Domains that are added to the Website PLUS what pages they go to as "landing pages".
To start with the list is empty.
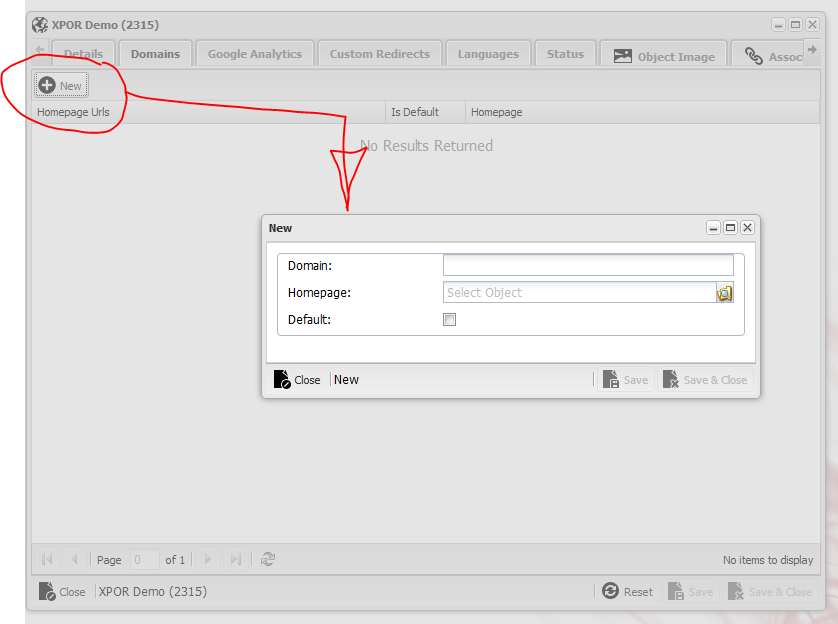
Click the + New button to open the URL editor form. Enter the Domain Name (http://www.my domain name). Then click the Homepage Select icon and browser your system to find the new page we made. Select it and save the entry, to close the form and display the new Domain / target web page combination in the Domains List.
You can now access the webpage by typing your domain directly into a Browser.
You will probably want to add a menu to your Home page - to access other pages from it. This will also enable you to add web pages on the Front end of the site, rather than the back end method we just demonstrated. This is covered in a separate Help Resource.

